Authentic Hyderabadi Chicken Biryani

If there is one dish that represents the pinnacle of Indian culinary heritage, it is the Chicken Biryani. More than just a meal, it is a cheerful masterpiece of aroma and flavor. A true Biryani is a labor of love where every grain of rice stands apart, infused with the essence of slow-cooked meat and a professional blend of hand-picked spices.
The "Dum Pukht" method we are using today is a traditional technique where the pot is sealed, allowing the chicken to steam in its own juices while the rice absorbs every bit of the fragrant saffron and mint. The result? A symphony of textures that is both light and incredibly satisfying.
At Recipe Ghar, we believe that everyone can master the Biryani at home. Follow our guide to the letter, and you’ll create a dish so fragrant, it will announce itself before it even reaches the table. Let's get the Dum started!
The Marination Secret. In a large heavy-bottomed pot (Handi), mix the chicken with all the marinade ingredients. Massage the spices into the meat and let it rest for at least 1 hour—overnight is best. This ensures the chicken is tender and flavor-packed to the bone.
The 70% Rice Rule. Boil a large pot of water with whole spices and plenty of salt. Add the soaked Basmati rice. Cook it for exactly 5–7 minutes. The grain should be long and bendable but still have a firm "bite" in the center. Drain immediately.
The Art of Layering. Over the marinated chicken in the Handi, spread the par-boiled rice evenly. Sprinkle the remaining fried onions, fresh mint, coriander, and the saffron-infused milk. Drizzle ghee over the top—it will seep through the layers during cooking.
The "Dum" (Seal). Cover the pot with a tight-fitting lid. Traditionally, we use a dough of flour to seal the edges, but foil works just as well. Place the pot on a high flame for 5 minutes until you see steam escaping.
Slow Finish. Place a flat iron Tawa (griddle) under the pot and lower the heat to the absolute minimum. Let it cook in its own steam for 35–40 minutes. This is where the magic happens!
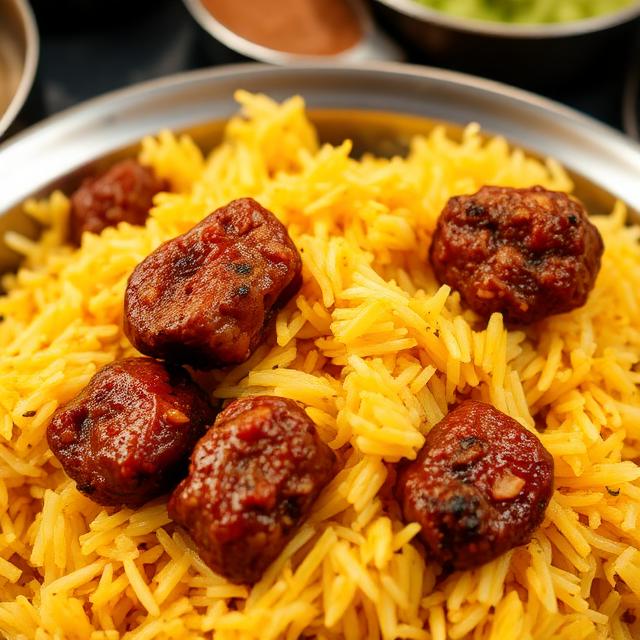
The Reveal. Turn off the heat and wait 10 minutes before opening. Gently fluff the rice from one side using a saucer or flat spoon to ensure you don't break the grains. Serve hot with Salan or Raita.